Advanced Photo & Video Features
Learn how to access and use Camera modes, effects, customization, and crop a photo.
In this tutorial, you will learn how to:
• Access camera modes and filters
• Customize photo and video settings
• Turn shutter sound on/off
• Use Night mode
• Crop a photo
• Use object eraser
• Access and use Pro mode
• Access and use Audio eraser
• Remaster a photo
Access camera modes and filters
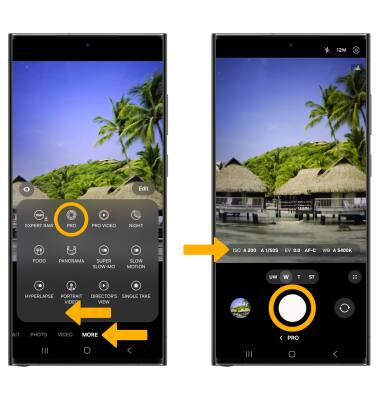
From the Camera app, swipe left to MORE to access camera modes such as Pro, Panorama, Slow motion and Hyperlapse.
Note: Pro allows you to manually adjust settings such as ISO, shutter speed and exposure levels. Panorama allows you to create wider photos by stitching together multiple photos. Slow motion allows you to record videos at a high frame rate which can be played in slow motion. Hyperlapse allows you to capture changes that happen slowly in a smooth time-lapse video.
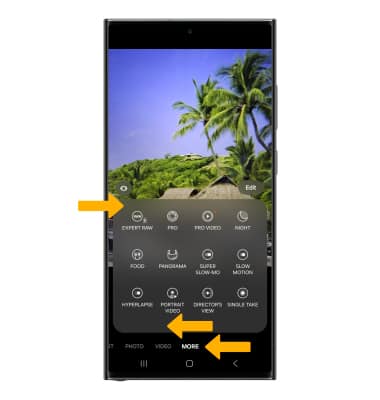
To access filters, select the Filters icon then select the desired filter.
Note: Filters are not available in some camera modes.

Customize photo and video settings
From the Camera app, select the ![]() Quick control icon then select the
Quick control icon then select the ![]() Settings icon. Edit settings as desired.
Settings icon. Edit settings as desired.
Turn shutter sound on/off
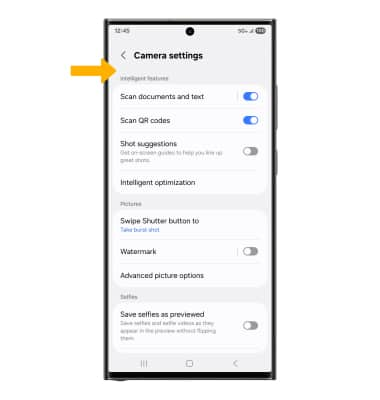
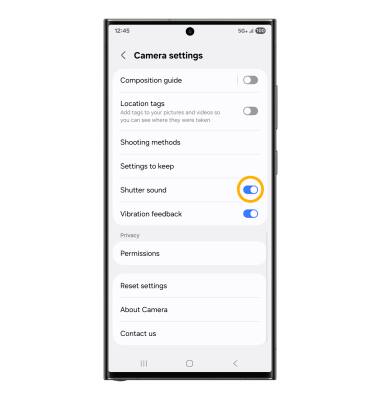
From the Camera settings screen, scroll to and select the Shutter sound switch.
Use Night mode
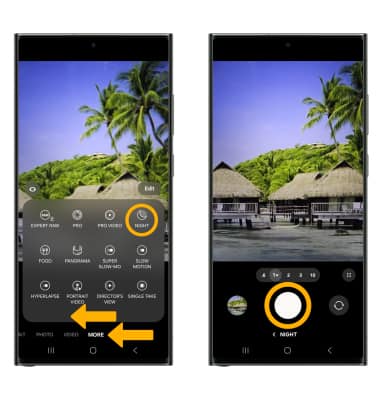
Use Night mode to take brighter and sharper photos under low light conditions. From the Camera settings screen, swipe left to MORE, then select NIGHT. Select the Capture icon.
Crop a photo
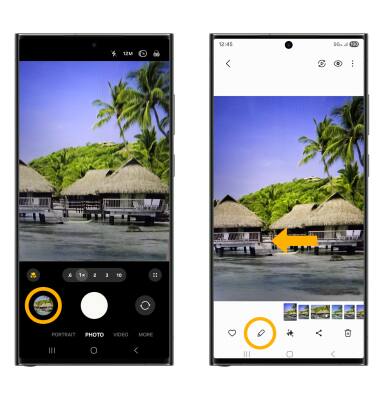
1. From the Camera app, select the Gallery icon. Swipe left to the desired photo, then select the Edit icon.
Note: Alternately, from the Apps tray, select the  Gallery app then navigate to and select the desired photo.
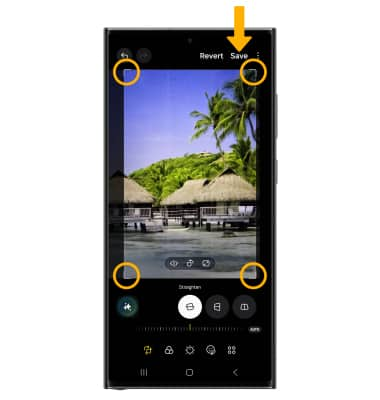
2. Select and drag the crop corners to crop as desired, then select Save.
Use object eraser
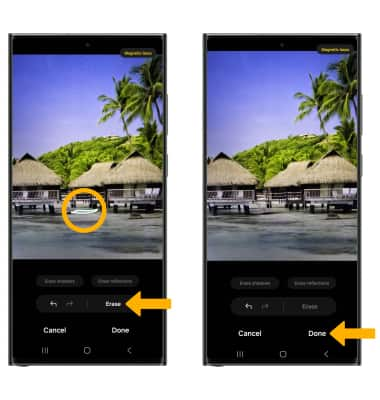
1. While editing a photo, select the Quick control icon, then select Object eraser.

2. Circle the desired object to erase, then select Erase. The area will be filled in using AI generated images based on the surroundings. When finished, select Done.
Access and use Pro mode
From the Camera screen, swipe left to MORE then select PRO. Adjust settings such as ISO, shutter speed and exposure levels as desired then select the Capture icon.
Remaster a photo
1. Swipe up on the the desired image in the  Gallery app, then select Remaster.
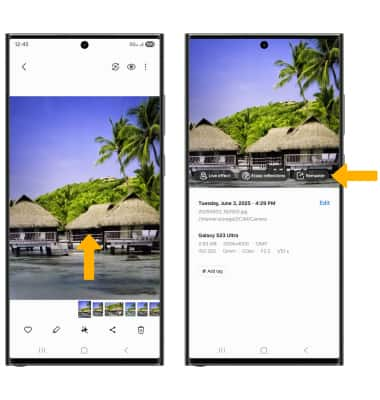
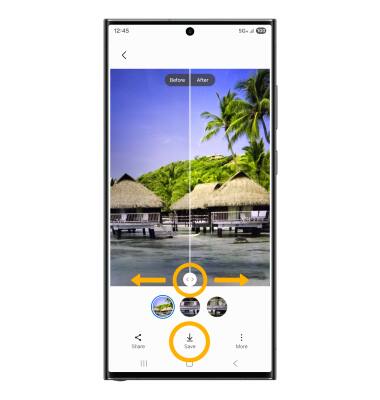
2. The photo will be remastered based on suggested adjustments. Select and drag the divider icon to view the enhancements' before and after effects. If you are satisfied with the result, select Save to save the remastered image.
